Skip to content

- Mechanical Engineering -

3D Scanning Service

Omnifab > Mechanical Engineering  > 3D Scanning Service

Get a 3D Model of Your Parts or Machinery Easily and Quickly

At Omnifab, we are proud to offer professional 3D scanning services in Quebec, Ontario, the Maritimes, and the Northeastern United States.

Using our portable 3D scanner, we can capture the most intricate details of physical objects to create functional digital designs

Service available throughout Quebec

Unbeatable turnaround times

High level of precision

3D Scanning: Cutting-Edge Technology for Your Industrial Projects

3D scanning is a process that involves capturing and converting physical objects into three-dimensional digital models. This modeling is achieved using devices that collect data on the shape, size, and texture of an object from various perspectives.


Once this data is acquired, it’s processed by specialized software to create an accurate 3D model, which can be used in a multitude of applications, including:

  • Reverse engineering
  • Part replication
  • Part repair
  • Improvement or modification of existing objects
  • Development of manufacturing molds
  • Inspection, verification, and quality assurance
  • Simulation and testing
  • Archiving
  • And much more!

At Omnifab, we offer this service at our facility or yours, which is very convenient when the item to be scanned is difficult, if not impossible, to transport.

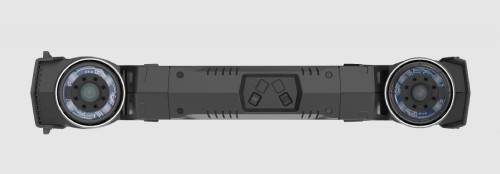
To create detailed 3D models from physical objects, our main tool is the HandySCAN 3D|MAX Series three-dimensional scanner, which relies on blue laser scanning technology.

This device is designed for 3D scanning of objects ranging in size from 0 to 15 meters (50 feet), but we can combine different scans to scan even larger objects. It is capable of delivering a level of accuracy of the order of 0.075 mm (0.0030 inch), even for highly complex geometries.

Additionally, it offers significantly faster acquisition speeds than structured light devices, and can scan glossy, oily, and reflective surfaces without the need for prior treatment or preparation of the part.

HandySCAN 3DIMAX

Once the scanning process is complete, we can share the 3D scan with you in the file formats that suit you best:

  • .step
  • .sat
  • .iges
  • and more

With just a few clicks, you can transfer your 3D models to virtually any industrial design or CAD software.

Do You Have Parts to be Scanned?
Contact Us Now!

How Does a Blue Laser 3D Scanner Work?

The process of 3D scanning using a blue laser scanner involves several steps:

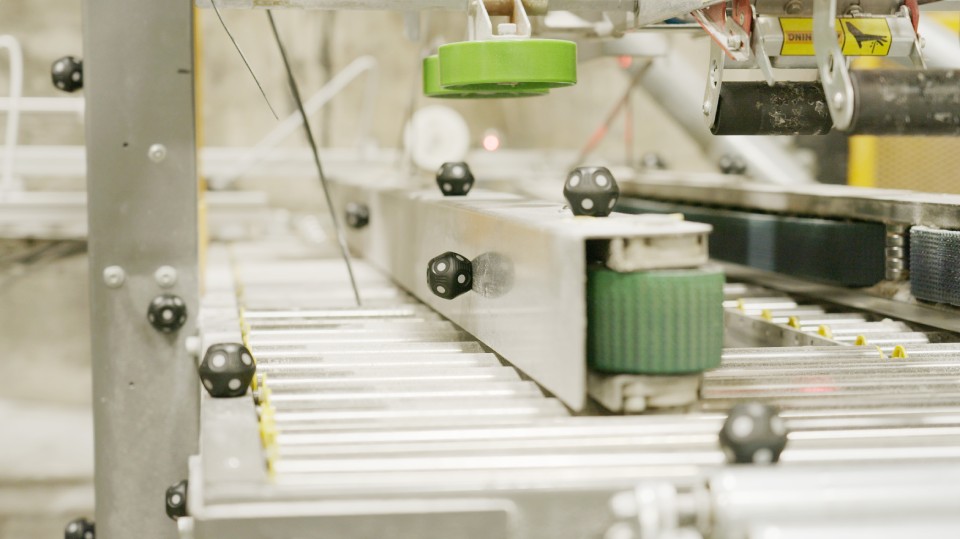
1 – Positioning the sensors (targets)

Magnetic sensors are strategically placed on the part or machine to be scanned (no more than 12″ between targets). If the object to be scanned is not magnetic, the sensors are attached to the surface with a temporary adhesive.

2 – Laser Beam Projection:

The scanner emits a blue laser beam onto the surface of the object being scanned. This laser is projected in the form of a grid of lines that deforms according to the geometry of the object. 

3 – Image Capture:

Sensors on the scanner capture images of the object with the projected laser mesh. They record deformations and variations in the laser beams resulting from the characteristic shape of the scanned object. 

4 – Depth Calculation:

By analyzing the deformations of the laser patterns in the captured image in relation to the known projected laser pattern, the scanner is able to calculate the depth or distance of each point on the surface of the object in relation to the scanner and the various targets. This technique is known as “triangulation.” 

5 – 3D Reconstruction:

Once the depth of each point on the object has been calculated, the image processing software can reconstruct the object’s complete three-dimensional geometry. This creates a detailed 3D model of the scanned object.

6 – Post-processing:

After scanning, post-processing steps may be necessary to eliminate artifacts and enhance the quality of the 3D model. Depending on the customer’s needs, this stage may take more or less time.

Post-processing time varies according to project type

The time required for our team to process the images captured by the 3D scanner will vary depending on the customer’s specific objectives. Here are 3 examples to illustrate this point:

scanner 3D boules
1
2
3
If the customer wants to be able to design a part related to the object to be digitized, there will be very little post-processing. Similarly, if you want to add a safety guard or other device to a machine and make sure it is 100% compatible with the machine, the post-processing time required is minimal.
If the customer wants to design a mold to manufacture or reproduce the scanned part, more post-processing is required to obtain a perfect theoretical model. In fact, our technician will have to spend some time eliminating all the "noise" from the initial scan (scratches, dust, wear from use, manufacturing tolerances, etc.).
If the customer wants a native 3D model (such as an Inventor or SolidWorks file) so they can track changes in the geometry of the object, our team must redraw the part and compare the result to the digitized file. This is the scenario that requires the most post-processing.

A Few Achievements Showcasing Our 3D Scanning Expertise

Contact Our Mechanical Engineering Department

Whether you want to entrust us with a 3D scanning project or learn more about this service, don’t hesitate to contact our mechanical engineering department.

Black oxide

24h emergency service available!

Join our team!